 Share
Share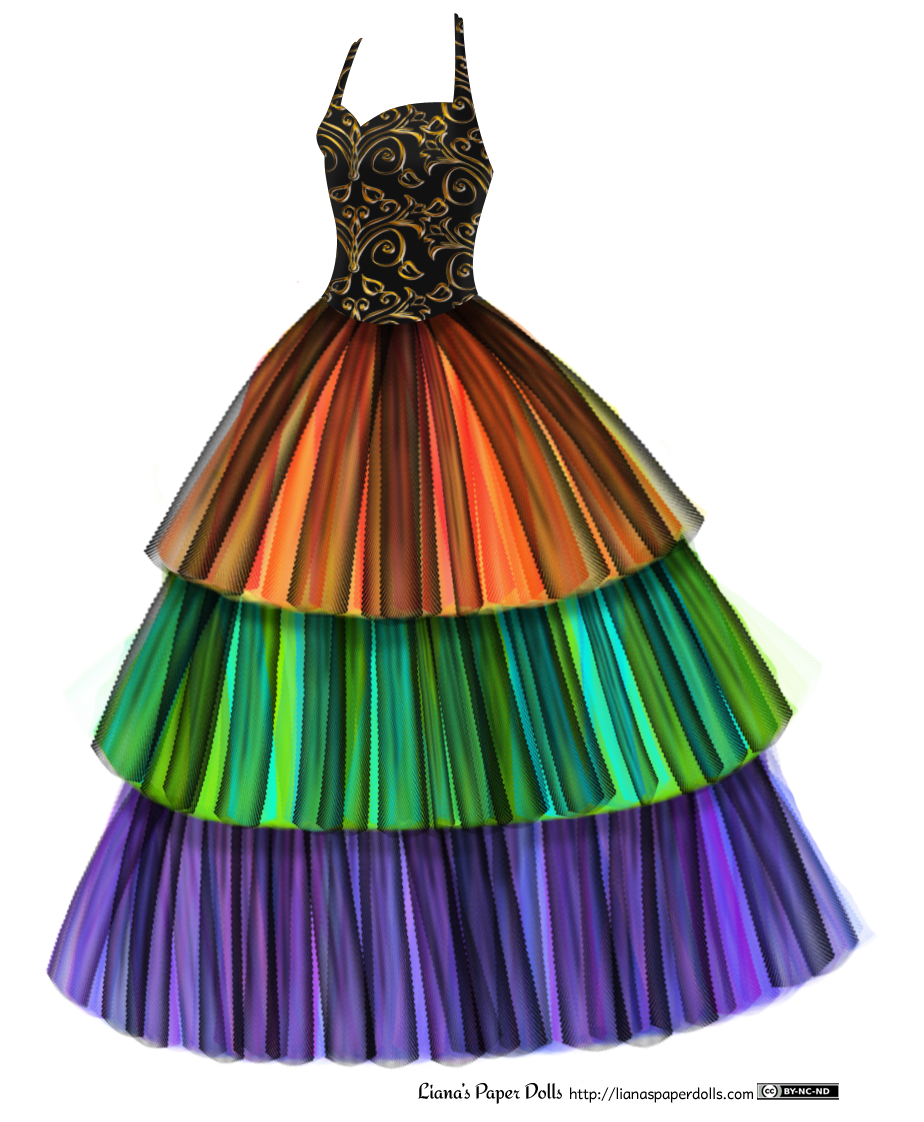 One of my Pinterest boards is titled “Paperdoll Reference.” It may as well be titled my “Why Can’t I Draw Like That?” board. I’ll pin dresses with interesting coloring, particularly shiny dresses or dresses with great draping, with the intention of using them to study from. Not being the most diligent artist in the world, I’ve been piling up interesting examples and not doing all that much with them. Then the thought came to me, why not make the learning process into a paper doll outfit? (Everything’s better with paperdolls.) Sort of like a tutorial, except I, too, start out with no clue what I’m doing. Let’s learn together!
Tutorials
Liana’s Greek Pattern Photoshop Brushes
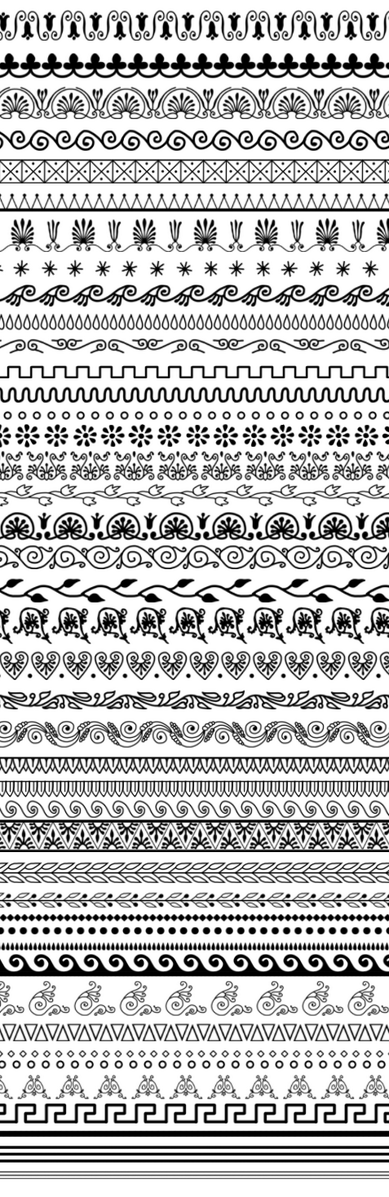 Has it really already been a couple of months since my last post? I’m sorry — I got caught up in other projects and discouraged about this one, for no good reason really. I don’t know if I’ll be able to get anything done by Friday, but I feel the urge to break my absent streak today, so for now let me give a present to the Photoshop users among you: the brushes I made when I did the ancient Greek peplos. Although I did the work of making them into brushes, I used the original patterns from a public domain book, The Costume of the Ancients, so I think it’s only right to pass the derivative work back into the public domain. Here’s the link to the zip file.
To install the brushes, just unzip the file, put the .abr file in your Brushes directory (for me, it’s under Presets), and restart Photoshop if necessary.
Free for personal and commercial uses, attribution appreciated but unnecessary, and if you change the brushes yourself, please keep the terms the same. To put it in Creative Common terms:

Liana’s Ancient Greek Pattern Brushes by Liana Kerr is licensed under a Creative Commons Attribution-ShareAlike 4.0 International License.
Based on a work at lianaspaperdolls.com.
I released it this way because I hate remembering where I got a particular brush and whether or not it’s OK to use for a project I’d like to make money off of, but if you use any of these brushes in your own work I’d certainly like to see how they turn out!
The brushes are a little on the large size, but I tend to use them at much smaller sizes, which is where they’ll probably look best. Feel free to ask if you have questions! (I may add a tutorial on using them later, but for now…)
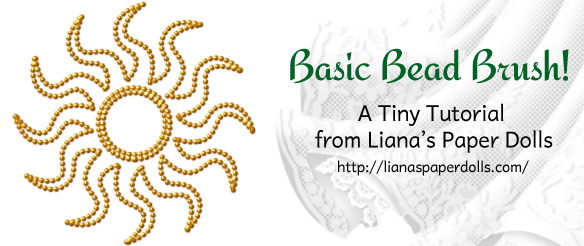
Tiny Tutorial #2: Basic Bead Brush in Photoshop
 Today’s Tiny Tutorial is very tiny indeed, but it’s a very useful technique in my bag of paperdolling tricks, and I wanted to put it up so I can refer to it in future tutorials. Now, I hesitate to do Photoshop tutorials because I’m hardly an expert myself, plus I work with Photoshop CS2, which is nearly a decade old, and I can’t promise that what I do is the best way to do things — or even accurate — for newer versions. Still, if someone can make good use of my techniques or the tutorial sparks someone’s imagination and that person improves on my techniques, then I believe it’s worthwhile.
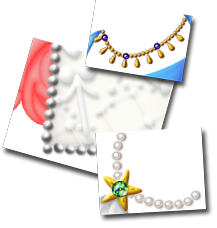 One thing you’ll see me do in several of the new series are small lines of pearls or beads. These are done with a special brush and layer styles in Photoshop; once you have those two things created, Photoshop does all the work of making as many garlands of beads or sequins or rhinestones as you need. (A welcome development after drawing thousands of little circles to serve as pearls.)
 First, let’s make the brush. Start with an 20 pixel wide circle brush, 100% hardness, opacity and flow. A single brushstroke looks like a circle, and a line from that brush is going to look straight, thick and well-defined. (Holding Shift while drawing makes the line straight.)
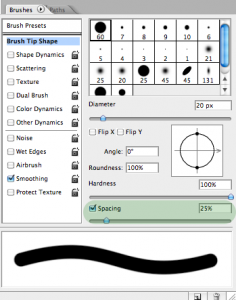 In effect, when I draw the line I’m drawing tons of little circles overlapping each other so that it looks like a solid line. What I want is to move those circles apart so that they don’t overlap, which will make it look like beads. So let’s look at the brush settings window. See the “spacing” setting? Right now, it’s at 25%, and that makes them spaced close enough together to look like a solid line. So all we have to do is…
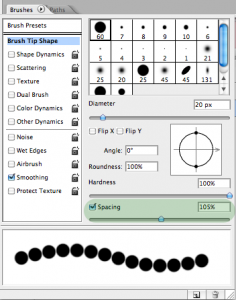 Increase the spacing. At 105%, each individual brushstroke is far enough apart from the next one that there’s a little space between it.
 There we have it, a dotted line. Save your brush if you like, to save yourself the trouble of having to do it again.
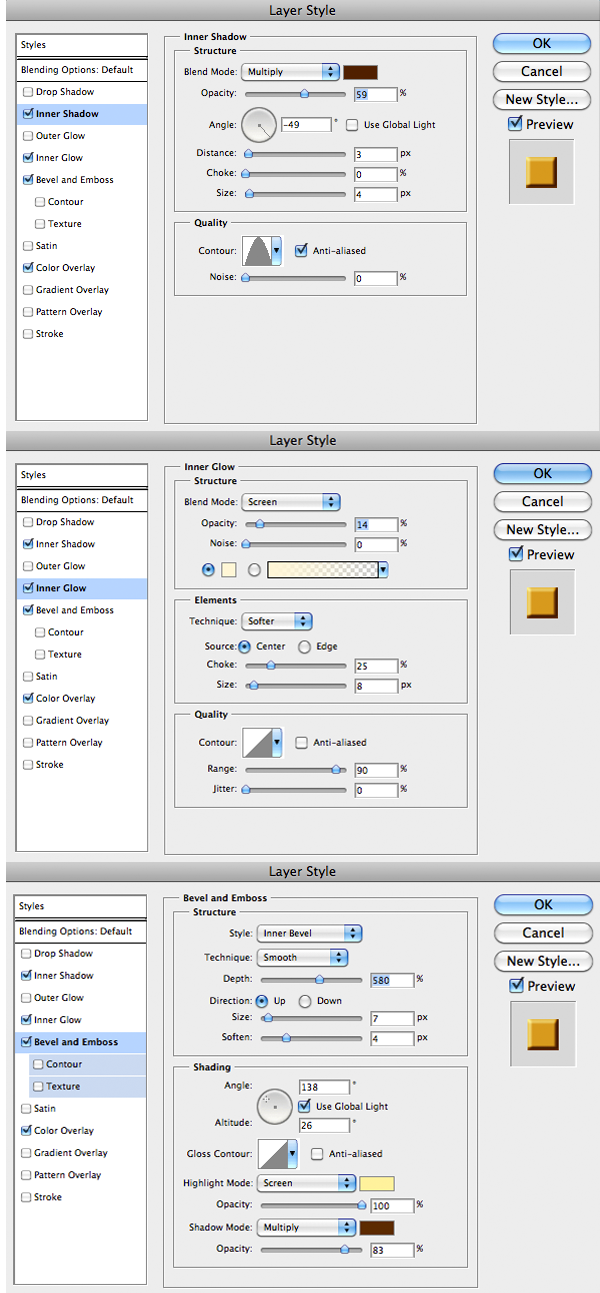
Now, let’s take a quick look at layer styles. Layer styles allow you to change how everything in a layer looks without making any permanent changes, so that you can easily change colors, add shadows and do other things to the underlying image. Layer styles are their own delightful world, and I’m just going to show off one small part of what you can do with them in this tutorial, with future Tiny Tutorials dedicated to how I use them to create the illusion of pearls, rhinestones, beads and so on. Double-click on the layer to open up the layer styles window.
 First, let’s change the color with color overlay. I’m going to make this row of beads look golden, so I’m going to start with a warm golden brown base (#d28a00).
 To give the beads shape, I generally play around with bevel and emboss, inner shadow, inner glow and drop shadow until I come up with an effect I like. For this example, I’ve just used these settings to give it a simple gold bead look.
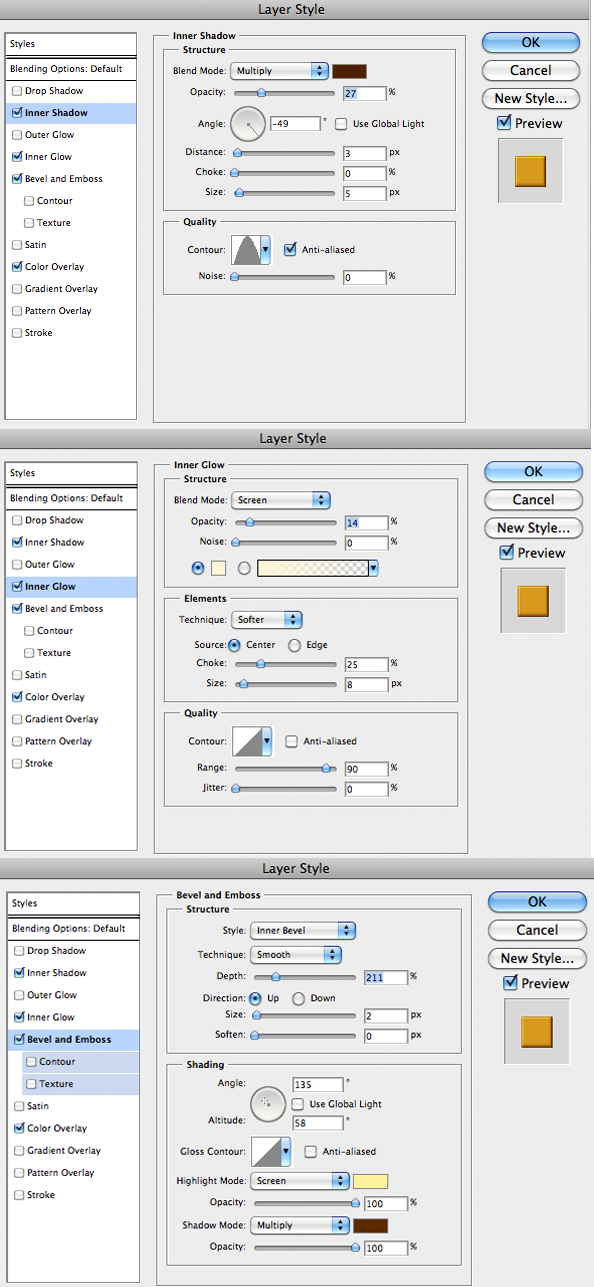
 When using this, you’ll want to keep in mind how big you want the beads to be, because the layer style changes drastically with the size of the brush. Using that same layer style with a 5 pixel wide brush only gives me a muddy brown line.
 I have to adjust the layer style to get anything resembling beads when the brush is so small. You’ll also note that the beads in the 5 pixel wide brush line look like they’re closer together than the beads in the 20 pixel wide brush line; if you’re as picky as I am you may want to adjust the spacing every time you have a new shape.
 With your brush created and your layer style made, all you have to do is draw your beads the way you want them. You can draw freehand, and I tend to use paths or shapes for this, to keep the lines nice and smooth or to be able to accurately go over the same area multiple times with different brushes; paths are well beyond the scope of this tutorial, however! (I used one of the default Photoshop shapes, set as a path, to create the sun symbol at the top of this post.)
In future Tiny Tutorials, I’ll build on this technique and show you the exact layer styles I use for sequins, metallic beads, rhinestones and pearls.
Tiny Tutorial #1: Draw Easy Rosettes
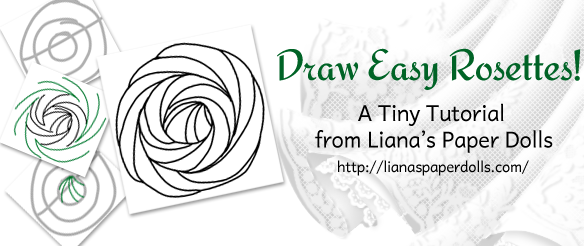
Welcome to my first Tiny Tutorial! In this series, I’ll show you some of the tricks and techniques I use to create my dolls and dresses. First, let’s draw some rosettes.
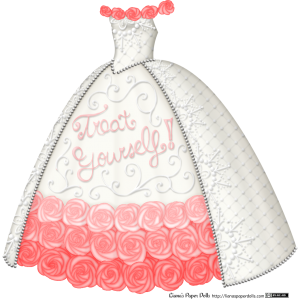 First off, let’s revisit the Broken Age cake dress from last Friday. The rosettes on the bodice and hem were meant to look like they were piped on with frosting, in the style of popular ombre rosette cakes. If you use Pinterest, I am quite sure you have scrolled past these cakes several times! The one I referenced was this purple specimen. The technique for drawing rosettes can be adapted for other things: look at these quinceañera gowns and this pink gown, isn’t it basically just a similar idea? It also makes a good border, especially since you can draw it quickly. It won’t look like a row of roses, but it doesn’t have to.
I did this with an iPad program, Procreate, that allows layers, so the guidelines are on a different layer than the finished drawing, and once I’m done I just delete that layer. You could mimic this by putting down guidelines with pencil and the actual rosette with pen, or wing it without guidelines.
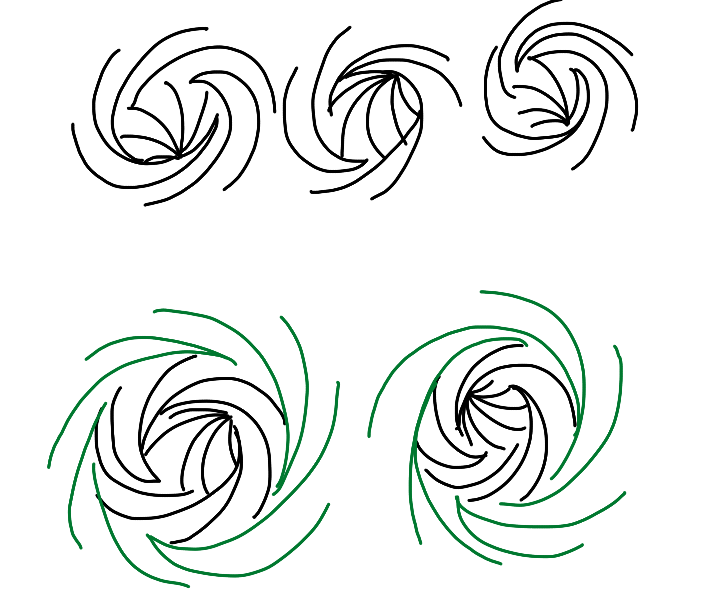
 To start, draw the guideline along which your rosettes will be placed, then decide on the size of your rosettes. For small ones, draw an olive: two circles, one smaller than the other. For large ones, draw a bullseye: three circles. Repeat the pattern so that the edges are just about touching. (Don’t worry about whether they overlap or not. These are just guidelines.)
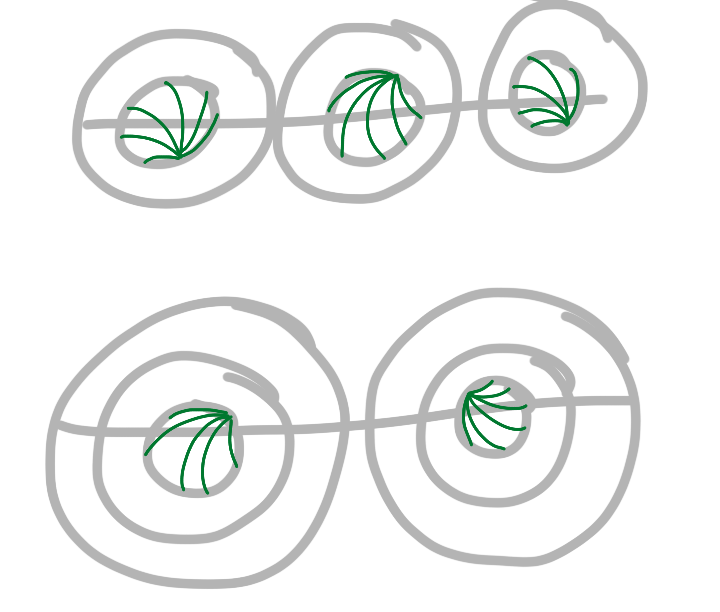 Draw 5-6 curved lines within the smallest circle. Start the lines from a single point on the edge of the circle and end them on different parts of the edge of the circle. The finished lines will look like a seashell.
 Starting with the inside line of the second circle, draw curved lines towards the outside of the circle. Unlike the previous rosette, you don’t want them to start on the same point: you might have two or three starting on the same point, but not all of them. You’ll want to draw the lines the opposite direction from the lines on the middle circle. They shouldn’t be all the same width, like a camera shutter.
 If you’re making a large rosette, then repeat the process for the large circle. Again, be sure to draw the lines going in the opposite direction from the previous level.
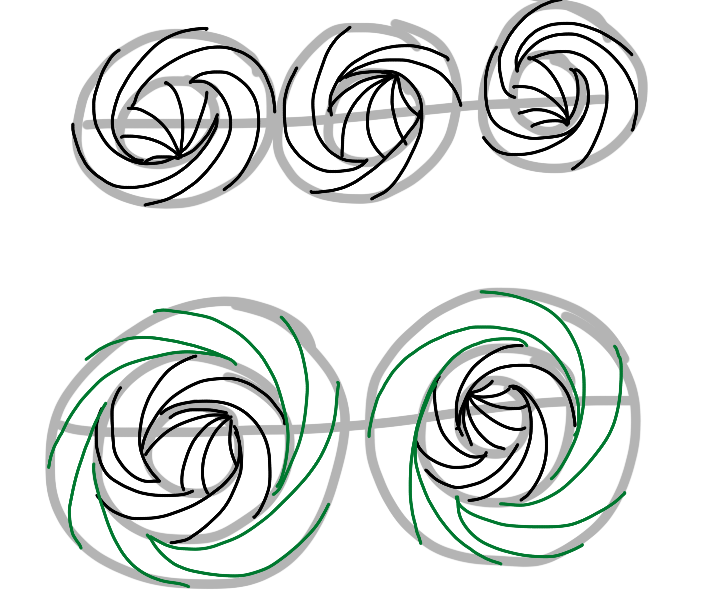
 Remove the guidelines, and you have what look like a row of starbursts.
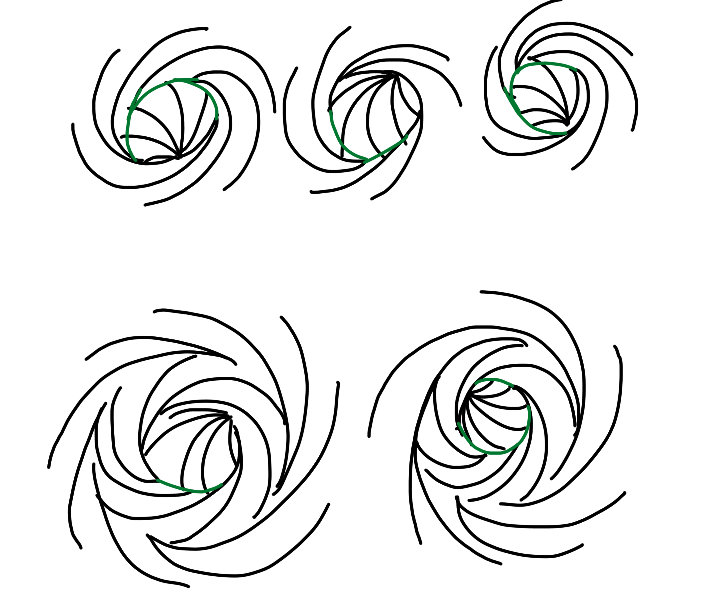 Now you’ll go in and connect the areas that were left blank when you took away the guidelines. Start with the middle circle. If you’re doing three-circle rosettes, draw in the missing lines in the second circle too.
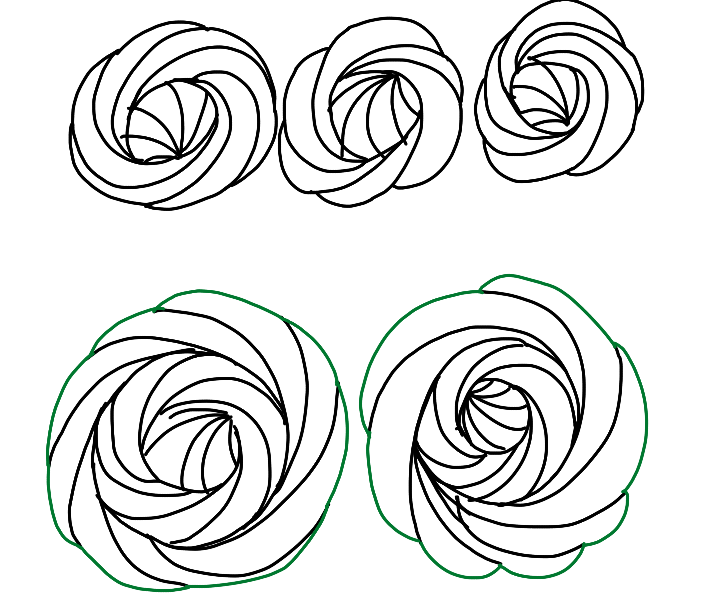 Next, draw the outside lines. When doing the outside lines of a rosette, draw a gentle arch continuing the end of one line to the end of the next one to form the petals.
 Clean up the lines and you have your rosettes!
If you try out this style of drawing rosettes, I’d love to see the results. By and by I’d like to do some more in-depth tutorials about how I color and so on, but tutorials like these, where I isolate one part of my technique, are easier to do. If you can think of a technique I’ve used in a previous dress that you’d like to know about, post a comment and I’ll add it to my list of tutorial ideas!
Tiny Tutorial #2 will show you how I created the diadem from the recent ancient Greek peplos. As always, you can follow me on Facebook, Twitter and Pinterest for updates, paper doll related thoughts and pictures of 1910s gowns. If you enjoy my work, I’d also appreciate your support through Patreon.