 Share
Share Today’s Tiny Tutorial is very tiny indeed, but it’s a very useful technique in my bag of paperdolling tricks, and I wanted to put it up so I can refer to it in future tutorials. Now, I hesitate to do Photoshop tutorials because I’m hardly an expert myself, plus I work with Photoshop CS2, which is nearly a decade old, and I can’t promise that what I do is the best way to do things — or even accurate — for newer versions. Still, if someone can make good use of my techniques or the tutorial sparks someone’s imagination and that person improves on my techniques, then I believe it’s worthwhile.
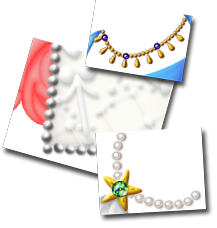 One thing you’ll see me do in several of the new series are small lines of pearls or beads. These are done with a special brush and layer styles in Photoshop; once you have those two things created, Photoshop does all the work of making as many garlands of beads or sequins or rhinestones as you need. (A welcome development after drawing thousands of little circles to serve as pearls.)
 First, let’s make the brush. Start with an 20 pixel wide circle brush, 100% hardness, opacity and flow. A single brushstroke looks like a circle, and a line from that brush is going to look straight, thick and well-defined. (Holding Shift while drawing makes the line straight.)
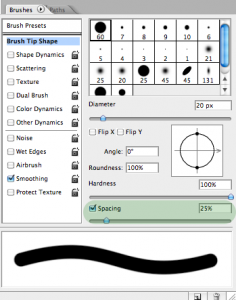 In effect, when I draw the line I’m drawing tons of little circles overlapping each other so that it looks like a solid line. What I want is to move those circles apart so that they don’t overlap, which will make it look like beads. So let’s look at the brush settings window. See the “spacing” setting? Right now, it’s at 25%, and that makes them spaced close enough together to look like a solid line. So all we have to do is…
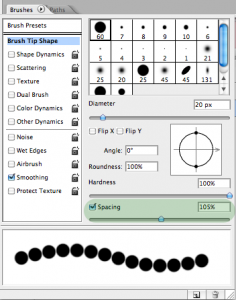 Increase the spacing. At 105%, each individual brushstroke is far enough apart from the next one that there’s a little space between it.
 There we have it, a dotted line. Save your brush if you like, to save yourself the trouble of having to do it again.
Now, let’s take a quick look at layer styles. Layer styles allow you to change how everything in a layer looks without making any permanent changes, so that you can easily change colors, add shadows and do other things to the underlying image. Layer styles are their own delightful world, and I’m just going to show off one small part of what you can do with them in this tutorial, with future Tiny Tutorials dedicated to how I use them to create the illusion of pearls, rhinestones, beads and so on. Double-click on the layer to open up the layer styles window.
 First, let’s change the color with color overlay. I’m going to make this row of beads look golden, so I’m going to start with a warm golden brown base (#d28a00).
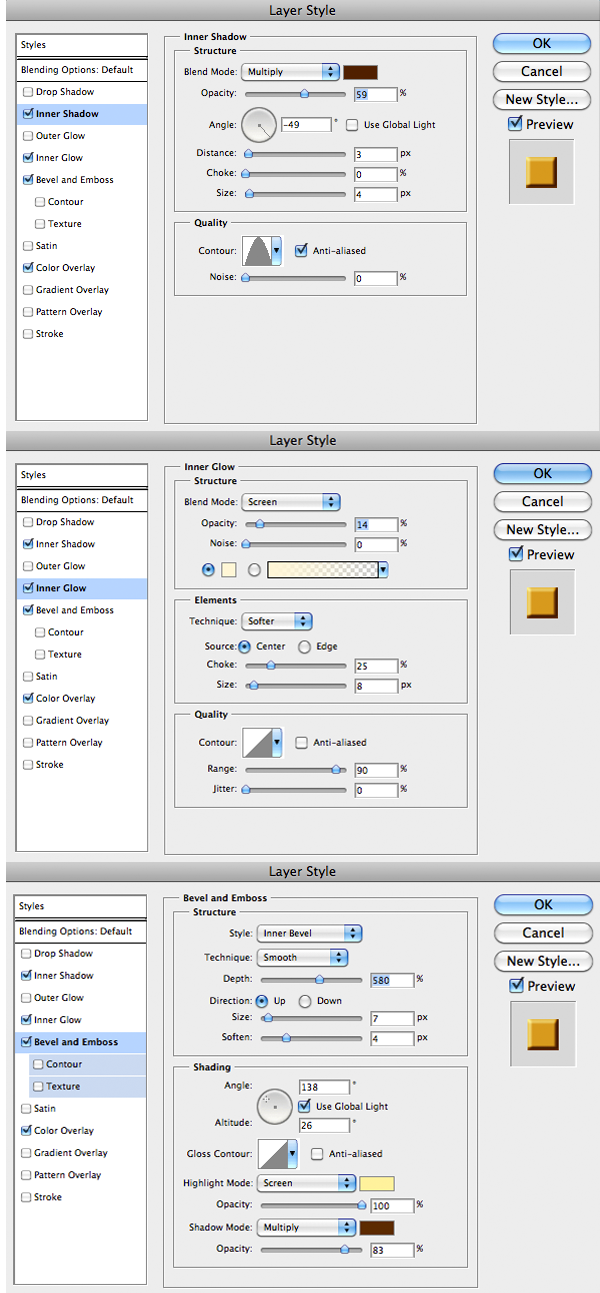
 To give the beads shape, I generally play around with bevel and emboss, inner shadow, inner glow and drop shadow until I come up with an effect I like. For this example, I’ve just used these settings to give it a simple gold bead look.
 When using this, you’ll want to keep in mind how big you want the beads to be, because the layer style changes drastically with the size of the brush. Using that same layer style with a 5 pixel wide brush only gives me a muddy brown line.
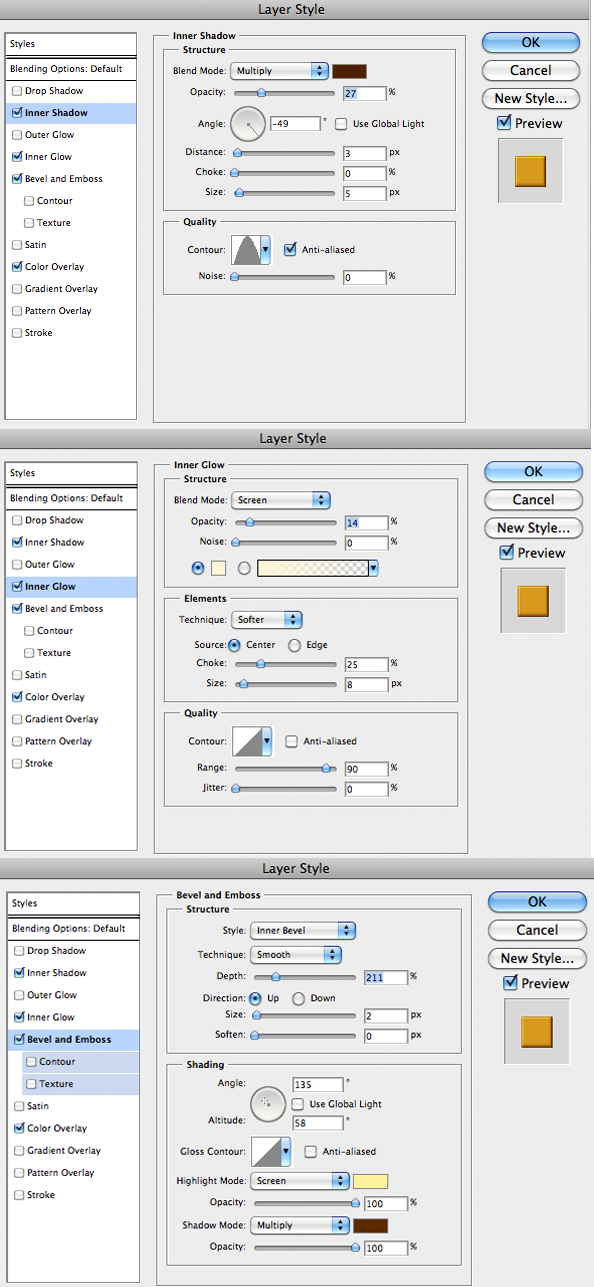
 I have to adjust the layer style to get anything resembling beads when the brush is so small. You’ll also note that the beads in the 5 pixel wide brush line look like they’re closer together than the beads in the 20 pixel wide brush line; if you’re as picky as I am you may want to adjust the spacing every time you have a new shape.
 With your brush created and your layer style made, all you have to do is draw your beads the way you want them. You can draw freehand, and I tend to use paths or shapes for this, to keep the lines nice and smooth or to be able to accurately go over the same area multiple times with different brushes; paths are well beyond the scope of this tutorial, however! (I used one of the default Photoshop shapes, set as a path, to create the sun symbol at the top of this post.)
In future Tiny Tutorials, I’ll build on this technique and show you the exact layer styles I use for sequins, metallic beads, rhinestones and pearls.
I really like this tutorial series that you’re doing, Liana. ‘Tis so interesting to see how you create all the different elements on your paper doll outfits.
Sarah :)
Thanks! A lot of these things I do are, well, really hacky, but they work and I hope they’ll be useful to someone :)
I never knew how to do this in PS! It’s similar to the way I make beads in Illustrator. Very handy – thanks for sharing :)
I keep reading interesting things about Illustrator, I sometimes wonder if it’d be worth learning…
This is fascinating. I confess that brushes are something I don’t use much nor do I know much about how they work. This would also work for just plain dotted lines that come in handy when trying to indicate cutting lines. I normally just make my dotted lines by hand, but I might have to look into adapting this technique. I think it would be faster (depending on how much dotted line I need).
Yeah, for a dotted line I’d just make a small rectangle, set it as a brush and change the spacing like I did here — that’d save some time :)
Could you make some guys dolls?
Honestly, it’s unlikely – I don’t know how to draw men very well and I have enough other things I want to put my time towards that I don’t think I’ll spend much of it learning how to draw them. Sorry!